
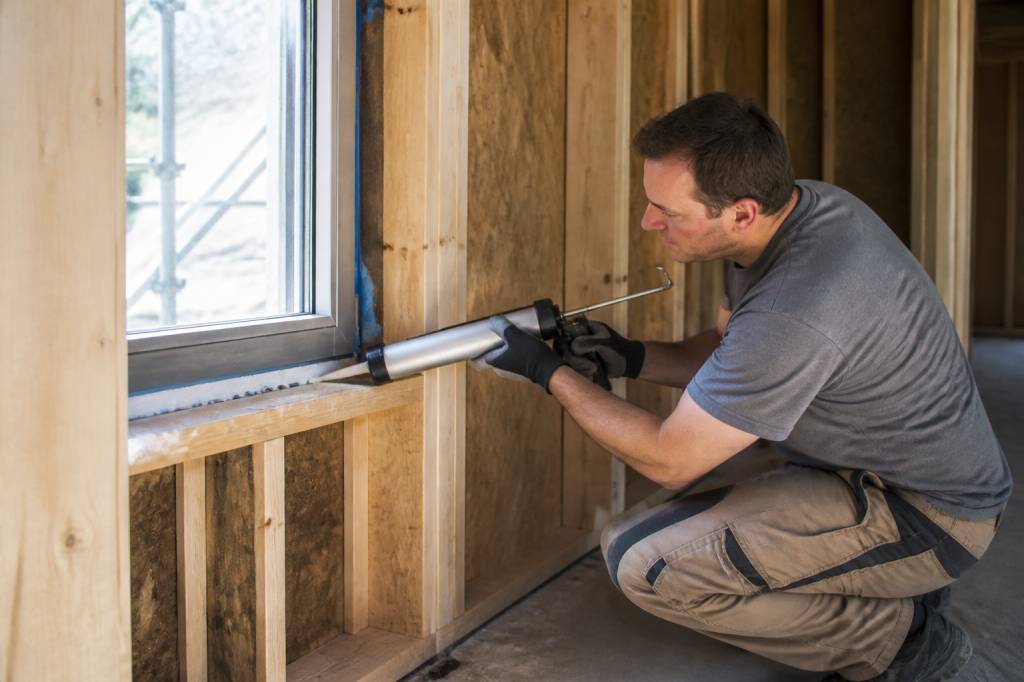
Airtight house design is one of the most effective ways to improve energy efficiency, reduce heating and cooling costs, and create a more comfortable indoor environment. It is also one of the most misunderstood parts of modern construction. An airtight home is not a house with no ventilation. It is a home where uncontrolled air leaks are carefully reduced, while fresh air is supplied through a planned ventilation system.
Think of your building envelope as a winter jacket. If the fabric is full of gaps, adding a thicker lining will only help so much. The same applies to insulation: it performs best when the house is properly sealed. Whether you are building from scratch, renovating an older property, or planning a high-performance extension, airtightness deserves attention from the first drawings to the final inspection.
What does an airtight house really mean?
An airtight house has a continuous air barrier that limits the movement of air through cracks, joints, penetrations, and poorly sealed connections. This air barrier is usually formed by materials such as membranes, sheathing panels, plaster, concrete, or specially designed airtight boards.
The key word is continuous. A wall may be well insulated, but if air can move around the insulation, the overall performance will suffer. Small gaps around windows, electrical outlets, roof joints, or service penetrations can create noticeable drafts and energy losses.
It is important to distinguish between air leakage and water vapour movement. These are related but different issues. Air can carry moisture into building cavities, where it may condense and contribute to mold, rot, or damaged insulation. A well-designed air barrier helps control both comfort problems and moisture risks.
Why airtightness improves energy efficiency
In a leaky home, warm indoor air escapes through gaps during winter. Cold outdoor air then enters through other openings. Your heating system must work harder to replace the lost heat, while occupants may still feel cold near floors, windows, and exterior walls.
During summer, the reverse can happen. Hot, humid air enters the building and increases the load on air conditioning or heat pumps. In regions with strong seasonal changes, uncontrolled air movement can waste energy throughout the year.
An airtight envelope helps your insulation do its job. It also reduces the amount of conditioned air that leaves the home. The result can include:
- Lower heating and cooling demand
- More stable indoor temperatures
- Fewer cold drafts and uncomfortable floor zones
- Reduced risk of condensation inside building assemblies
- Better performance from heat pumps and other efficient systems
- Improved sound insulation from outdoor noise
There is a practical benefit too: an airtight home feels more solid. Rooms maintain their temperature more evenly, and you are less likely to discover that one bedroom is tropical while another feels like a garage in January.
Start with a continuous air barrier
The most important design exercise is to draw the air barrier around the entire heated part of the building. This includes the walls, roof, floors, windows, doors, and all transitions between them.
Imagine tracing a single unbroken line around the living space. Where does it pass at the foundation? How does it connect to the wall? What happens at the roofline? How is it sealed around a window or a pipe? If the line stops at any point, the design needs more attention.
Common air barrier options include:
- Interior airtight membranes or smart vapour-control membranes
- Exterior sheathing panels with sealed joints
- Fully taped structural insulated panels
- Continuous plaster or render systems
- Concrete foundation walls and slabs, when carefully detailed
- Spray-applied air-sealing products in specific areas
No single material automatically creates an airtight home. The result depends on how the materials connect. A high-quality membrane is not very useful if it is cut around every electrical box and left untaped.
Pay close attention to junctions
Most airtightness failures occur at junctions rather than in the middle of a wall. These locations deserve detailed drawings and clear instructions for the construction team.
Important junctions include the connection between:
- Foundation and above-ground walls
- Walls and roof or attic spaces
- Walls and floor assemblies
- Window frames and wall openings
- Exterior doors and surrounding structure
- Attached garages and the main living area
- New extensions and existing buildings
A small project anecdote illustrates the problem. On one renovation site, the insulation was installed correctly and the windows were excellent. Yet the living room remained drafty. A smoke pencil test later showed air moving through the joint between the old masonry wall and the new timber frame. The gap was not large, but it ran almost the full width of the room. After sealing the connection, the comfort difference was immediate.
Windows and doors are frequent weak points
High-performance windows can improve comfort, but only when installed correctly. The frame-to-wall connection needs several layers of protection: an airtight inner seal, insulation around the frame, and weather protection on the exterior.
Expanding foam may help insulate the gap around a window, but it should not be treated as a complete airtightness strategy. Foam can shrink, deteriorate, or remain incomplete behind the frame. Tapes, membranes, backer rods, and compatible sealants often provide a more reliable system when installed according to the manufacturer’s instructions.
Pay attention to door thresholds, sliding doors, and the junction between the frame and finished floor. These areas experience movement and regular use, so flexible, durable seals are essential. A beautiful front door that whistles in the wind is still a disappointing front door.
Seal service penetrations before they disappear
Every cable, pipe, duct, and structural element that passes through the air barrier creates a potential leak. These penetrations should be planned before walls and ceilings are closed.
Typical problem areas include:
- Electrical cables entering exterior walls
- Plumbing pipes beneath sinks and behind bathrooms
- Extractor fan and dryer ducts
- Heat pump and air-conditioning lines
- Recessed lighting installed in ceilings
- Roof vents and chimney connections
- Attic access hatches
Use grommets, airtight collars, compatible tapes, and sealants designed for the material involved. Avoid relying on ordinary duct tape for permanent building work. It may be useful for temporary repairs, but its name has caused more than a few long-term problems on construction sites.
Where possible, group services inside a dedicated service cavity. This allows electricians and plumbers to work without repeatedly puncturing the main air barrier. It also makes future alterations easier and reduces the temptation to cut through carefully sealed layers.
Insulation and airtightness work together
Airtightness and insulation are separate performance goals, but they must be designed together. Insulation slows heat transfer through materials, while airtightness limits heat loss caused by moving air.
For example, a well-insulated wall with a continuous air barrier may perform very well. The same wall with gaps around the edges, missing insulation, or poorly sealed sheathing can develop cold spots. These cold areas can reduce comfort and increase the risk of surface condensation.
Installation quality matters as much as the insulation type. Batts should fit tightly without being compressed. Rigid boards should be installed with carefully sealed joints. Blown insulation must reach the specified density and depth. The best product cannot compensate for poor workmanship.
Do airtight homes need mechanical ventilation?
Yes, usually. Once uncontrolled leaks are reduced, planned ventilation becomes essential for removing moisture, odors, and indoor pollutants. Cooking, showering, cleaning, furniture, and even people add moisture and contaminants to the air.
A mechanical ventilation system provides predictable air exchange. In many efficient homes, a heat recovery ventilation system, often called HRV, extracts stale air from kitchens, bathrooms, and utility rooms while supplying fresh air to bedrooms and living spaces. The outgoing air transfers much of its heat to the incoming air, reducing energy waste.
In warmer or more humid climates, an energy recovery ventilator may also help manage moisture. The appropriate system depends on climate, occupancy, building size, and local regulations.
Good ventilation design should include:
- Fresh-air supply to bedrooms and living areas
- Extraction from kitchens, bathrooms, and laundry rooms
- Accessible filters for regular maintenance
- Quiet fans and correctly sized ducts
- Balanced airflow without excessive pressure differences
- A clear maintenance schedule for homeowners
Do not assume that opening windows occasionally provides the same control. Natural ventilation can be useful, but it depends on weather, occupant habits, and security. Mechanical ventilation keeps the air exchange consistent, even when the windows remain closed.
Use blower door testing during construction
A blower door test measures how much air leaks through the building envelope. A powerful fan is temporarily installed in an exterior doorway, creating a pressure difference. Technicians can then measure the leakage rate and locate problem areas using smoke, infrared cameras, or other tools.
Testing at the end of construction is helpful, but testing before walls and ceilings are finished is even better. If the result is poor while the air barrier is still visible, repairs are usually faster and less expensive.
For the best results, plan for at least two tests:
- An early test after the main air barrier is installed
- A final test after services, finishes, and access panels are complete
Ask for the test results and keep them with the building documentation. The measurement provides more than a score; it confirms whether the design was actually delivered on site.
Common airtightness mistakes to avoid
Many failures are caused by simple coordination problems rather than complicated technical errors. The most common mistakes include:
- Choosing an air barrier without deciding how it will connect at junctions
- Leaving membrane overlaps untaped or poorly pressed
- Installing electrical boxes through the air barrier without airtight accessories
- Forgetting attic hatches and pull-down ladders
- Using incompatible sealants that do not adhere to the membrane
- Allowing multiple trades to cut through sealed layers without repair instructions
- Waiting until the final inspection to look for leaks
- Assuming insulation automatically creates airtightness
Another common issue is poor communication. The architect, designer, contractor, electrician, plumber, and HVAC installer all affect the air barrier. A short site meeting focused specifically on airtightness can prevent hours of remedial work later.
A practical strategy for renovation projects
Existing homes are more challenging because the air barrier may be hidden, discontinuous, or made from several different materials. Start with an energy assessment and, if possible, a blower door test. This will show where the largest leaks occur.
Prioritize accessible areas such as attic floors, basement ceilings, window joints, service penetrations, and doors. Sealing these locations can deliver noticeable improvements without opening every wall.
When renovating extensively, consider creating a new continuous air barrier on the interior or exterior side of the structure. The correct approach depends on moisture control, insulation thickness, facade design, and local climate. Avoid sealing one side of a wall without understanding how the assembly will dry.
Also remember that air sealing can change the ventilation balance. After major improvements, check combustion appliances, kitchen extraction, bathroom fans, and overall indoor air quality. A tighter house needs a more deliberate ventilation plan.
Build airtightness into the project budget
Airtightness is usually less expensive to achieve during construction than after the finishes are installed. Include membranes, tapes, collars, sealants, testing, and skilled labor in the initial budget rather than treating them as optional extras.
Good detailing can also reduce costs. A simple, continuous air barrier is easier to install and inspect than a complicated one with unnecessary changes in direction. Fewer penetrations, grouped services, and standardized window details make the work more reliable.
For homeowners, the return comes through lower energy demand, improved comfort, reduced drafts, and better protection against moisture-related damage. The most efficient home is not necessarily the one with the most expensive equipment. It is often the one that first avoids wasting the energy it already produces.
Make airtightness part of good building practice
An airtight house is not sealed shut. It is carefully controlled. The building envelope limits unwanted air movement, while mechanical ventilation supplies fresh air where and when it is needed.
The winning formula is straightforward: define a continuous air barrier, detail every junction, seal service penetrations, install windows and doors correctly, coordinate all trades, and test the result before the work is hidden. These steps may not be as visually exciting as a new kitchen or a striking roofline, but they have a lasting effect on daily comfort.
When airtightness is treated as a design priority rather than a last-minute repair task, the home becomes easier to heat, quieter to live in, and healthier for its occupants. That is solid building performance—and it starts with closing the gaps that should never have been there.