How to install standby generator for reliable home backup power
Why a standby generator is worth considering
Power outages are inconvenient at best and expensive at worst. One minute the fridge is humming, the furnace is running, and your internet is alive and well; the next, everything goes silent. If you work from home, rely on medical devices, or simply don’t want to throw away groceries every time a storm rolls through, a standby generator can be a smart upgrade.
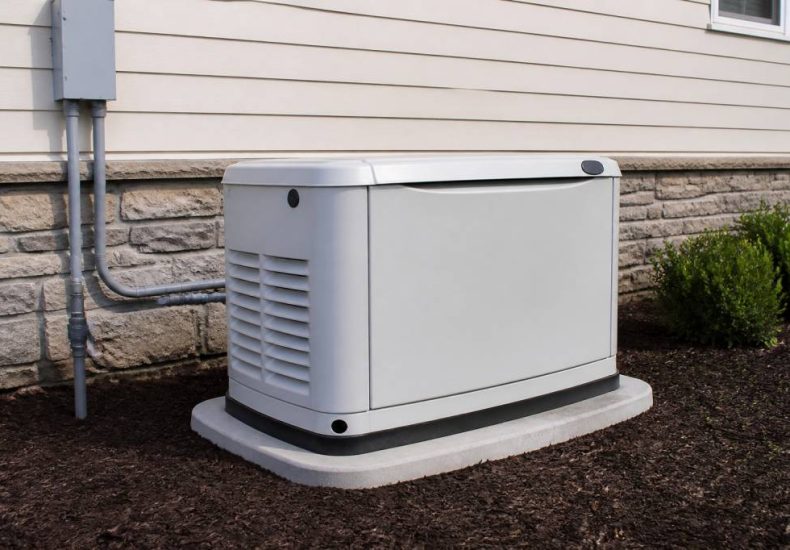
Unlike a portable generator, a standby unit is permanently installed outside your home and connected to your electrical system. When the grid goes down, it starts automatically and keeps selected circuits, or even the whole house, powered up. That means no running outside in the rain, no tangled extension cords, and no guessing whether the generator has enough fuel left.
Installation is not a casual weekend project for most homeowners. It involves electrical work, fuel connections, permits, and careful placement. Still, understanding the process helps you plan the job properly, compare contractors, and avoid costly mistakes. And yes, a little planning upfront beats standing in the dark later with a flashlight in your mouth.
Start with the right size generator
Before you even think about pouring a pad or running wire, you need to size the generator correctly. Oversizing wastes money. Undersizing leaves you with a shiny box that still can’t handle the load you care about.
The easiest way to size a standby generator is to list the appliances and systems you want to power during an outage. Some homeowners only want essentials like the refrigerator, sump pump, furnace blower, internet equipment, and a few lights. Others want the whole house covered, including air conditioning, ovens, and laundry equipment.
Typical loads to consider include:
- Refrigerator and freezer
- Heating system or boiler controls
- Sump pump
- Well pump
- Lights in key rooms
- Internet modem and router
- Garage door opener
- Medical equipment
- Air conditioner or heat pump
Each device has a running wattage and, for motors, a higher starting wattage. That startup surge matters. A sump pump may look modest on paper, but it can demand far more power the instant it kicks on. If you’re unsure, a qualified electrician or generator installer can perform a load calculation and recommend an appropriate size.
In many homes, generators in the 14 kW to 24 kW range cover essential loads comfortably. Larger homes or whole-house coverage may need more. The key is not chasing the biggest unit on the shelf; it’s matching the generator to your real-world needs.
Choose the installation location carefully
Where you place the generator matters more than most people think. It needs to sit outdoors, on a stable base, with enough clearance for ventilation, service access, and local code compliance. It also needs to be positioned far enough from doors, windows, and vents so exhaust gases don’t drift indoors.
Keep in mind that standby generators are not small decorative appliances. They make noise, produce heat, and need breathing room. A common mistake is squeezing the unit into a corner where it “looks neat.” Neat is good. Unsafe is not.
When choosing the location, consider these factors:
- Distance from openings such as windows, doors, and dryer vents
- Level ground or a prepared concrete/composite pad
- Accessibility for maintenance and fuel service
- Protection from roof runoff, snow buildup, and standing water
- Clear path for the electrical conduit and fuel line
Local codes and manufacturer instructions often specify minimum clearances. Follow both. If the manufacturer says one thing and the code says another, the stricter requirement usually wins. That’s one of those unglamorous details that saves you from trouble later.
Check permits, codes, and utility requirements
Installing a standby generator is not just a matter of buying equipment and plugging it in. In most areas, permits are required for electrical work, gas line work, and sometimes the generator pad itself. Your utility provider may also have rules for transfer equipment and backfeed protection.
This is where many homeowners get stuck. The generator may be perfectly good, but if the paperwork or wiring is wrong, the install can be delayed or fail inspection. Not exactly the kind of surprise anyone wants.
Before beginning, verify:
- Electrical permit requirements
- Gas or propane permit requirements
- Setback and clearance rules
- Noise restrictions, if any
- Utility approval for service upgrades or disconnects
If your panel is full, your service is undersized, or your fuel supply needs upgrading, factor that into the project early. A generator install sometimes reveals other weak links in the home’s infrastructure. It’s better to learn that before the trench is open.
Prepare the base and mounting area
A standby generator needs a solid, level foundation. Most manufacturers recommend a concrete pad, though some approved composite pads are also used. The goal is to keep the unit stable, elevated enough to avoid water pooling, and isolated from direct soil contact.
If you’re pouring a concrete pad, make sure it’s level and sized according to the generator’s specifications. The pad should extend beyond the footprint of the unit and provide room for service clearance. In areas with frost or poor drainage, proper site prep is especially important.
Before setting the unit, the area should be cleared, graded, and compacted as needed. If the generator is near landscaping, leave space for airflow and maintenance. Don’t plant shrubs right up against it. The bush may look great in spring, but it won’t improve combustion air or make the technician’s life easier.
Run the electrical connection the right way
The electrical side of a standby generator installation is where precision matters most. The generator connects to the home through an automatic transfer switch, which safely disconnects the house from utility power before switching to generator power. This prevents dangerous backfeed into the grid and keeps your equipment protected.
There are two common transfer switch approaches:
- Whole-house transfer switch: powers the entire electrical panel or a large portion of it
- Load-shedding or selective circuits setup: powers only critical circuits chosen in advance
The transfer switch must be sized correctly for the generator and the home’s electrical load. In many installations, the switch is mounted close to the main panel, with conduit running between the generator, transfer equipment, and service panel. Proper wire sizing, breaker sizing, and grounding are essential.
This is not the place for guesswork. A wiring error can damage appliances, trip breakers, or create a serious safety hazard. If you are not a licensed electrician, this portion should be handled by one. Even if you are comfortable with tools, residential standby power systems are one project where “close enough” is not acceptable.
Connect the fuel supply
Most standby generators run on natural gas or propane. Natural gas is convenient if your home already has service, while propane is common in rural areas or where gas lines are unavailable. The fuel connection must be sized and installed according to the generator’s demand.
A common mistake is assuming the existing gas line is enough. Sometimes it is. Sometimes it isn’t. Generators need a steady fuel supply, and undersized piping can starve the engine under load. That leads to poor performance, shutdowns, or failure to start when you need power most.
Fuel line installation typically requires a qualified gas technician or licensed plumber, depending on local rules. The line must be pressure-tested, leak-checked, and connected with approved fittings. For propane systems, tank size matters too. A small tank may power the generator for only a limited time, especially during a long outage or winter storm.
Important fuel-related checks include:
- Fuel type compatibility with the generator
- Pipe sizing based on distance and BTU demand
- Shutoff valve placement
- Leak testing after installation
- Tank capacity for expected runtime
Install the battery and control components
Standby generators rely on a battery to start automatically when utility power fails. That battery should be installed, connected, and maintained according to manufacturer instructions. A dead battery is one of the simplest reasons a generator refuses to start during an outage.
Many systems also include control wiring, exercise settings, and remote monitoring features. Some newer models can send alerts to your phone if there’s a fault, low battery, or maintenance issue. That’s a nice feature, especially if you’re away when the power goes out.
Make sure the control panel is accessible for routine checks. You don’t want to have to crawl through mud or move tools every time you inspect the unit. Clean access encourages regular maintenance, and regular maintenance keeps the generator ready.
Test the full system before you trust it
Once everything is installed, the system needs a proper startup and test. This is more than flipping a switch and admiring the lights. A real test should simulate a power outage, allow the generator to start automatically, and confirm that the transfer switch moves the load safely.
During testing, check that:
- The generator starts automatically
- The transfer switch changes over correctly
- Critical circuits receive power
- No unusual noises, vibrations, or alarms occur
- Exhaust is directed away from the home
- Voltage and frequency remain stable under load
It’s smart to test the generator under realistic load conditions. A system might start fine but struggle once the furnace, refrigerator, and sump pump are all running at the same time. That’s the kind of problem you want to discover on a sunny afternoon, not during a thunderstorm.
Plan for routine maintenance from day one
A standby generator is only useful if it works when needed. Like a furnace, vehicle, or roof, it requires regular maintenance. The good news is that most tasks are straightforward if you stay on schedule.
Typical maintenance includes oil changes, air filter replacement, battery checks, spark plug inspection, and periodic test runs. Many units have an automatic exercise cycle that starts the generator weekly or monthly. That helps keep internal parts lubricated and alerts you to problems before an outage does.
Here’s a simple maintenance checklist:
- Check the battery condition regularly
- Inspect for leaks, corrosion, or loose connections
- Keep the area around the unit clear
- Replace filters and fluids on schedule
- Review alert logs if your unit has monitoring features
If the generator sits outside in a harsh climate, inspect it more often. Snow, ice, heavy rain, and debris can all affect performance. A little attention goes a long way.
Common mistakes to avoid
Generator installations go wrong for predictable reasons. Most of them are easy to prevent if you know what to watch for.
Some of the most common mistakes include:
- Choosing a generator that is too small
- Placing it too close to doors or windows
- Skipping permits or inspections
- Using an undersized fuel line
- Improper transfer switch installation
- Neglecting battery maintenance
- Failing to test the unit under load
Another frequent issue is trying to DIY the entire project without the right licenses or experience. There’s nothing wrong with a hands-on homeowner helping prepare the site, managing the schedule, or coordinating materials. But electrical and gas work should usually be left to qualified professionals. That’s not a warning sign of weakness; it’s a sign you’d like your house to stay standing and your insurance company happy.
When to hire a professional
Even if you’re comfortable with general home improvement work, a standby generator install often crosses into specialist territory. If your project involves a panel upgrade, new gas piping, trenching, or utility coordination, bringing in a professional can save time and prevent expensive mistakes.
A good installer should help with load calculations, permit applications, equipment placement, transfer switch setup, fuel connection, startup, and final testing. Ask for references, verify licensing, and get a detailed scope of work before signing anything. The best contractors are clear, organized, and willing to explain the steps without turning every answer into a mystery novel.
A smarter way to keep the lights on
Installing a standby generator is one of those home upgrades that feels invisible right up until the power fails. Then it becomes the most useful thing on the property. With the right size unit, proper placement, safe fuel and electrical connections, and a maintenance plan, you can turn a frustrating outage into a manageable inconvenience.
For many homeowners, the real value is peace of mind. You’re not just buying backup power. You’re buying time, comfort, and continuity when the grid gets unreliable. And that’s a pretty good trade for a box humming quietly outside while the neighborhood goes dark.